Growing a Herb Garden Indoors

how to grow an indoor garden


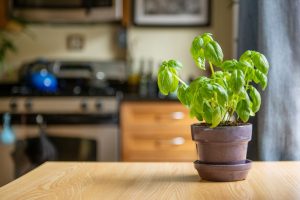
Growing an herb garden indoors offers many benefits over a herb garden outdoors. The two main benefits are that the herbs are convenient and they are able to control how much light and water they receive. This control of factors is important to the successful growth of any plant, and especially important for herbs, who at times may be subject to harsh weather conditions and are not always in the best of health.

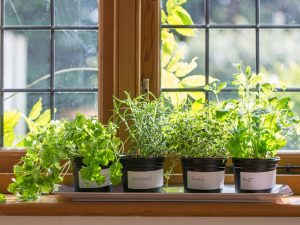
One of the main things to remember when growing herbs inside is that they still require the same amount of natural light that they would receive if growing in natural conditions. The type of light, of course, will depend on the type of herbs you are growing. Some herbs, such as rosemary, benefit from a lot of natural light, whereas others prefer partial shade in order to protect them from the midday heat.

Potted herbs can benefit from the use of grow lights to simulate those conditions. However, a home grower’s herbs would likely be best served by using only natural sunlight or the fluorescent kind.

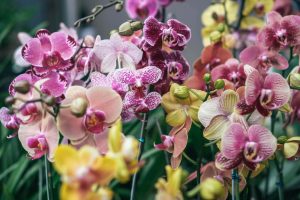
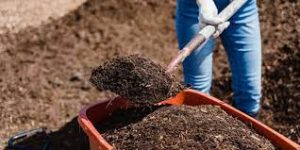
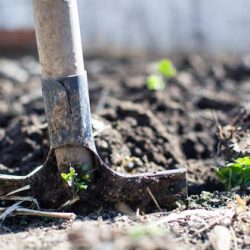
Another thing to remember when growing herbs is the moisture of the soil. To create perfect, healthy soil, mix plump bedding materials with light-colored gravel and determine whether it will drain water properly. However, herbs won’t thrive in the type of soil used for roses. Roses thrive in soil that retains water, and herbs likely won’t survive in the same type of soil. Some gardeners mix the soil with sand to make it drain more quickly.

Watering the herbs adequately is important. In some cases, the potted herbs may dry out more quickly than the garden herbs, especially during the summer. Water the herbs until the soil is moist, but don’t leave it soaking wet. You can tell when the herbs are properly watered by sliding a finger from the surface of the soil to ensure it is moist. If the soil feels damp, the finger can easily be wiped without difficulty. If the surface of the soil is dry, it needs to be watered again.

Make sure to use the best potting mix for the herbs you are growing. If the potting mix is lightweight, the herb roots will not be able to penetrate it and it will result in poor growth and poor circulation of nutrients.

Some of the herbs required to be grown in pots are chives, tarragon, parsley, basil, thyme, garden cress, dill, oregano, rosemary, and sage. They are mostly annuals, and they enjoy the hot weather. Make sure that they are placed in your kitchen around the beginning of the summer, so they will be available to you all year round!

Follow the sun advice and make sure to give your herb garden frequent sunlight. Most herbs require sun for between 6 and 8 hours a day, so keep them out of the hot midday sun.

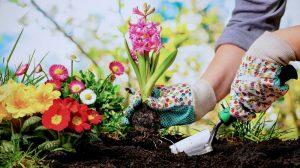
Use nutrient rich soil. Make sure that there is good drainage in the soil. If there is too much drainage, the roots will rot. This is for ensuring that the herbs will receive enough water to grow and expand, but not too much to drown the roots.

If you are growing herbs in pots, the pots must have a good drainage system. You can create a simple drainage system by drilling some small holes in the bottom of the pots, about one half an inch in diameter. Make sure that water can flow freely out of the bottom of the pot.

The pots must have adequate holes to allow the water to drain rapidly and prevent the pots from becoming water logged. If you are growing herbs in wooden baskets, ensure that the baskets have been inoculated with a general fungicide.

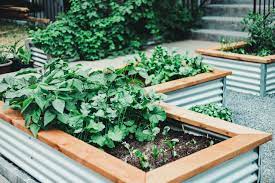
One of the great benefits of growing herbs is that you can grow them indoors or outdoors. If you are growing herbs indoors, you must make sure to place the pots in a location with as much natural light as possible.  A friend who handles South Carolina IRS Liens grows herbs in his office and I always enjoy the smell when I visit. If you are raising your herbs outdoors, you will find that herbs require at least six hours of sunlight and they can tolerate partial shade.

As you can see, growing herbs in pots is not difficult and allows you to have a real herb garden.


How to Grow Basil

growing basil


Today there are sprays, scented candles, plug-ins, and even discs that promise to freshen your air by putting a variety of aromas into your home. However, when you know better, you know that many of these so-called aromatic herbs aren’t actually aromatic at all. But they make you think that they are! Whether you love the smell of lavender, or love the scent of cinnamon, there is a plant that will give you that delicious fragrance. Basil is such a plant – aromatic, delicious, and works beautifully with almost any food!

yeshas a spice to it – basil anise

The plant grown for its rich culinary uses is called basil. It is actually an annual in the Warmish/Tropical regions of Asia. It grows best in full sunlight, and perfect conditions for this plant include:

– a place that gets lots of sun

– partial shade

– if possible, a sheltered spot

– if possible, rich soil

Basil is also considered worthy enough to grow in a container. These plants can grow anywhere from 12 to 24 inches tall.

One of the first things you need to do is and make sure that the plant gets enough water. Water regularly but try not to over water as that will kill the roots. As the plant grows, trim the suckers that grow in the joint of the stalk and the stem. This will ensure that the plant has fewer stems and more leaves.

You also need to prune your basil a little as it starts to grow. Cut off the flowers as they appear, and clip off the side shoots that try to break away from the main plant. As you trim the plant, pull the leaves gently but firmly from the top of the stalk.

You need to use aphids, thrips, black vine, plant lice, spider mites, and sawfly larvae to control pest issues with Basil. If you find a bad infestation, handpick or spray the insects and spray directly with insect repellant. Be sure to wash your insecticides well before using them on your plants.

Harvesting Basil

When you grow basil, always pick the same stems again and again after the first harvest. This means that you will end up with a continuous supply of leaves. Leaves can be dried as you would leaves, although a better option is to use them fresh. All you do is pick major leaves and clip them off the stem. Basil will still grow, so you can harvest again right through the season.

Basil is used in many dishes such as soups, salad dressings, sauces, pesto and breads. Outside of culinary applications, basil can be used as a common herb and has a long history of medicinal uses. It has powerful anti-oxidant and carcinant effects. Also, it is considered an aid to digestion.

A holistic health wellness Coach showed me Some of the medicinal uses for basil include:

– lowers cholesterol

– relieves stomach pain and improves digestion

-Calming effect for the digestive system

-Lowers blood pressure and reduce hypertension

-An aid to digestion

-An antiseptic effect

-Helps baby’s stomach ache

-flies away if insects are near

Sun, soil and water are the basic requirements for a basil plant, and are considered the best three things to grow when you are growing basil. Sunlight is by far the best for basil to grow. If you are growing your basil in a pot, a nearby window is perfectly alright, however, you can also grow basil in a garden outside if you have enough sunlight. It will grow well in almost any soil, which includes regular potting soil, loamy soils, and sandy soils. Basil will also grow well in containers if it is given the option.

Growing and caring for basil is quite easy and simple. It does not require much fertilizer, and you should not need to do much “manual labour” when tending your plant. Watering is for the most part, all you need to do is pick your basil leaves and be happy with it! Yes, that’s it, water, eat and be happy!

Why Compost?

how to compost


If you stopped to take a look at a smelly heap of garden debris in your driveway this past week you may have wondered what it was and what was so smelly about it. If you walked into your back yard last night you could not see much of anything that it was so smelly about. You are right; it is not composting enough. Not yet!

So what is composting? You invent composting. You break up materials which will and can be composted and let them rot. Then you place that mixture in a heap and allow Mother Nature to do her thing.

Earth worms are the workhorses who do all the work to create the compost and you can depend on them to do a good job. Earth worms breathe through their skin so they do not like open, airy spaces. They prefer a firm, earthy soil which also makes for better composting.

Let’s look at why you would want to compost. It is many. Let’s assume that you are healthy and happy. You enjoy nature and wanted to beautify your yard and garden. Wouldn’t it be wonderful if you had an automatic system set up so that your lawn would never need to be trimmed? When you use a push reel mower instead of a gas or electric mower it will shorten the amount of time needed to maintain your lawn.

The decomposition of grass clippings and leaves helps to reduce the amount of pollution that accumulates in landfills. Your lawn will be less prone to disease due to the amount of air which is filtered away. You will not need to wash off the cut grass because of the high humidity that it enjoys. inhibited air circulation around the roots of the grass makes for a healthier lawn.

So what does composting mean when you walk into your family’s kitchen and cut a big plate of potatoes? In the kitchen the nutrients that are added to the soil are used to bring flavor to food. In the garden the same nutrients are used to help plants to grow. When you compost your kitchen waste it will add nutrients to the soil, help to keep the plant’s roots healthy and evens the pH level to a neutral average.

So what can you do to help decompose your clippings?

Tip 1 – Fragrant plants or flowers will draw the attention of flies. Trim them before you add them to your compost pile.

Tip 2 – Change the water in the pail when you are changing the liquid fertilizer.

Tip 3 – Of course you can throw them in the compost pile but make sure that the leaves are dry or they will sprout green flies. Remember the less you water the more they will grow!

Tip 4 – Two ahead you can place the leaves in a folded paper towel and fold it closed. Keep it in a plastic bag and make a few sandwiches.

Tip 5 – Coffee ground is a great source of nitrogen.

Tip 6 – Grass clippings you can throw out if they have grown too long. They will provide the plants with extra nitrogen

Tip 7 – Synthetic fertilizers or man-made may be harmful to the plants. If you do decide to use a synthetic fertilizer avoid using the older, highly concentrated forms. Use the 25-50-0 combination.

Tip 8 – Remember don’t overload your pail. A lot of compost filler comes out of the container as wilted plants and matter. Just be proportionate to the amount of material in the container.

Tip 9 – If your container is leaking make sure you line it with mesh or carpet.

Tip 10 – If you are using digestion fertilizer for your high protein plants like tomatoes, cucumbers, etc. don’t forget to stay away from high nitrogen fertilizers like chicken manure and earthworm castings.

Tip 11 – You can also put paper and junk mail into your compost.  When you receive flyers for translations services near me, and it’s something you’re not interested in you can throw it into your compost after you shred it.

The plants should be watered and left standing over night after you have made your afternoon tea. Then they are moist and ready to work on the pests until the early morning dew has dried.

Over the wire fence or wall your organic container garden will prosper well with a minimum of care. If you decide to medical your container garden it is a good time to consider a mix fertilizer. Follow the instructions that come with the mix and be sure to follow them to the letter.

By practicing some organic gardening you can find yourself with a great crop of vegetables as a gift from me to you.

Don’t forget to look for garden art ideas at your local garden center or tote board.

What You Need to Know About Weeds

identifying weeds


Weeds are pests that are neither pleasing to look at nor to smell. They neither contribute to a beautiful garden with vibrant colors nor enrich the soil with their beauty and scent. Instead they create an untidy mess in the garden and try to make it impossible for plants to thrive well.

It’s true that once they’ve been planted they do not die overnight. But they do still grow and spread. Therefore, having a well-kept garden means that the chances of their ever growing under control are slim.

Why You Should Keep Your Garden Weed-Free

Weeds can make it difficult for plants to grow in many cases. They lower the yield of plants and damage the quality of others. If left unchecked, they also rob the soil of nutrients and water.

In some cases, you need to get rid of them. But often gardeners are hazardously away from using weedkiller. Its effectiveness is very weak and often results in more harm than good. This is because most weedkillers (especially those that are intended for use on lawns) contain chemicals that remain in the soil. These chemicals can remain there for years.

The Good News

Despite all this, there’s still one way to control weeds effectively. In organic container gardening, you squash any hoping weeds together so that they can’t spread. You kill off the seeds once they’re small enough for the insect or animal to bite through.

In other words, you catch the little critters before they can get the ball out of the gramophones. You make gardening easier for you and your plants without killing the environment.

So What’s The Best Gardening Fertilizer?

For small gardens or pots, I wouldn’t use liquid fertilizer. They’re expensive and the liquid is thicker than the original soil. I’d also avoid most multi-purpose fertilizers. They contain nutrients that may be appropriate for plants grown in the real world, but the phosphorous and nitrogen components of the fertilizer often exceed the requirements for plants grown in pots.

For larger gardens and gardens along pavement or patios, I wouldn’t use liquid fertilizer either. They are expensive and can make the soil difficult to dig. If you don’t have any containers, can you borrow one?

I do use some liquid soil conditioner and there’s no harm in feeding the plants during the growing season. It gets rid of the weeds and nutrients, but the thick liquid makes it hard to dig.

What about indoor plants?

Indoor plants are fine as long as the wind doesn’t blow the fertilizer onto the leaves or windows.

Some growers choose to feed the plants weekly, like we do. But other growers do not feed at all. Once the pot set-up is established, the plant is able to handle its own.

Manage your fertilizer like you do your plants.Check them out and see if they are getting enough nitrogen, but also keep track of how much nitrogen they are getting and how much they are getting of the wrong kind. This way you’ll know when to add more nitrogen or to decrease the amount of nitrogen being given.

Manage your fertilizer like you do your plants. It’s always a numbers game. Make too much and you’ll get sick and nicking. Make too little and your plants will be malnourished and dying.

Make sure you understand how much nitrogen, the kind of nitrogen, is in your fertilizer. Plants need this kind of nitrogen for cells to form and grow. When you make too much, the plant doesn’t absorb enough and other cells get stunted.

A carpenter who does Annapolis painting houses once told me he used cereal nutshells as fertilizer. disgusting! I wouldn’t buy the cheapest primer but I do use nutshells now and for sure they do work, but don’t I use cheaper brands better poured nitrogen.Commented with calcium chloride, raincoat shellac, gravel and ash – yes, that’s fertilizer! Yoking! I use them for weed control in my landscape work as well.

Making compost will work wonders in your garden and of course, in your container garden too. You can use the material quickly or you can mix it into the soil around your fruit trees.

Making your own compost is a wonderful way to conserve the nitrogen in decomposing organic material. Choose a spot for your compost pile near your garden with a nice shade and some protection from the wind.

If you choose a compost pile, you’ll need a container. The container size will depend on how much you want to compost and how much space you have. An easy way to begin is to purchase a 1 or 2 gallon black plastic storage barrel. They’re fairly cheap, and with a little work, you’ll soon have your very own compost pile.

Okay, now you have a container and you have some stuff to poke into it.

How to Water Your Garden

how to water a garden


It is common to find amongst home gardeners, the idea that perennial plants require much less water than annuals. It is an idea that has been given somewhat support, by the fact that in dry periods requiring heavy usage of water, many of the older trees and shrubs become brown and dry, as if they require a year in the desert. Furthermore, in long dry spells many plants belonging to the geranium family are said to be drought resistant.

However, whenever there is long periods of dry weather, the question arises as to how the grass around the garden should be cut to make way for the new garden plants. The simple answer is to install a sprinkling system, making sure that sufficient water is applied at the appropriate intervals. Needless to say, this has to be done carefully, following the right procedures.

Taking account of the climatic conditions and aware of the soil type in the garden, decide on the number of sprinklers to be installed. Normally, two or three sprinklers is enough in a small garden, but on a large scale a larger system is almost always better. Irrigation is best done by hand, so as not to introduce insect or disease problems.

The installation of an irrigation system is best done in phases. The first group of plants should be watered when the soil is damp and the next round of watering should take place after the plants have established themselves. Once this is done, the other sprinklers can be installed.

phase one: Spreading out the irrigation pipes

Before installing the irrigation system, the landscape should be prepared by removing all weeds, including the ones that grow naturally as well. I didn’t know this till a Chicago basement cleaning company informed me, but weeds are the number one cause of homes and basements to flood.  So make sure you clear out the weeds.

The type of irrigation system to be used must be decided at this point. If a rainfall is likely in the coming weeks, it is better to use the drip irrigation method, whereby the water is placed in small intervals over a long period. If the possibility of a rainy day is not a reality, it is better to use the sprinklers system that deliver the water in the form of spray.

The second group of plants, which are also required to be watered in the course of the growing season, are the trees and shrubs. It is essential to determine the type of system to be used in the garden, as this will affects the amount of water, and frequency of watering.

A popular practice is to leave the grass clippings on the lawn after mowing. In this way a green grass helps the soil absorb the moisture, and at the same time avoids wasting water on the weeds. A better practice is to mulch the lawn, using bales of straw or bark. This is preferable to grass, as the latter causes a partial mulching, and so a hardening of the lawn is avoided. The clippings need to be left on the lawn to prevent the top lowings from erosion, but they must be removed in the course of every growing season. Straw is usually easier to eliminate than to be shredded by top lows.

The soil, and therefore the future of the garden, depends largely upon the choice of plants. If you want to cross the balance between the ornamental garden and a useful crop garden, you must choose plants that will flower as well as if they were useful in some way in the kitchen. It is a golden rule to remember, especially with younger children: think of what you are about to do, and if it is to be an ornamental garden, choose plants that are scented. If it is to serve a useful purpose, choose plants that are liked by the kids.

The degree of ornamental versus useful planting is difficult to uphold, but there is no need to abandon common sense. Generally, useful plants are easier to replace than ornamentals. If a border is to be planted with attractive but non-flowering plants, an annual or perennial bed should be used. Leaving perennials to die back in the winter, therefore, is to cause real beauty to your garden. With the coming of the seasons, perennials will dye, and it is necessary to replace them. In any case, the only plants that can be of actual use in the garden are vegetables and flowers. The rest are merely window dressing.

Caring for Orchids and Growing Mint

how to care for orchids


Of new interest, and recently protected by the mitochondrial bacteria, orchids are slowly catching on with more and more homeowners. Orchids truly are a beautiful flower. There is a well established and quite reliable line of argument that orchids are surviving simply because they are difficult to grow. This notion has been stated for centuries, yet recently it has become amazingly popular. Below we try to outline the special needs of orchids:

The Herbalistle, a plant in the same family as the mint family, has been native to hairy animals for centuries, and has been used as a medicinal herb for hundreds of years. In China the plant is used inero-therapy ( relieving colds by invigorating the diseased tissues) and as a fever reducer. It has traditionally been used in holistic medicine, for hosting feverfew in the stomach and treating other maladies, but is now known mainly as a homeopathic cure.

There are over 100 species of Balm, all of which are greatly enjoyed world wide. These hardy plants can grow quite well in the US climate and are really easy to care for.  They are also highly valuable as according to a tree appraisal. The mint family has a reputation for being able to repel insects (including humans) in the garden, proving them to be remarkably resilient.

Some herbs can be picked for drying or freezing without loss of quality, others retain their quality for cooking. triangular leafed thrives in full sun differs from the wild type of mint in that its thin leaves feel spongy and fresh.

Growing mint inside a large pot or window box actually creates a better micro-climate than planting it in the open ground. The positive waning and rising of the sun in the spring period means that less energy is required in the summer than in the spring.

During the summer months use mint regularly in recipes. Together with basil they make a perfect marinade for tomatoes. Mint is used in a variety of ways, whether by drying, freezing or using fresh as an herb in recipes, it is an essential ingredient in Mediterranean dishes along with a myriad of aromatic herbs.

Medicinally, mint can be used as a fever reducer, antioxidant, digestive aid and an insect repellent. It originated in countries around the Mediterranean and was used by the Greeks and Romans.

Cultivation

Sow annual or perennial mint from seed. It is not essential to the plant to have a specific number of leaves to merit consideration. The number of leaves may be dependent on the season and the soil. There is a wide range of species suitable for cultivation, all needing rich well drained soil with a pH of between 6 and 7.

It is a good idea to grow mint in its own pot or container as this will aid growth and control the spreading of the leaves and prevent them from turning woody mythology also foretells of the qualities of this wonderful herb. The plant is reputed to be of help in curbing illness and soothing the soul.

Myths and Secrets

The culinary virtues of mint are eloquently spoken by Herodotus (ails) in “C refueling: flavoring of commonsense and medicine”. Growing mint should not be undertaken in secret – everyone can see thaws and smell the mint plants from where it sprouts.

Leave the growing mint in the pot and only remove the leaves that are needed for the kitchen.

Use mint fresh or add it to potpourri.

Stuff it in cheese plates, breads, soups, beverages and sauces.

Treat it as an herb and include it in meats, salads and sweet dishes.

Ready-to-Use Recipes for Mint

Mint is well-known as a flavoring for everything from ice cream to vegetables. Here is a recipe for a dish that uses mint:

4 slices fresh mint (just picked)

2 sprigs rosemary

2 sprigs lemon balm

2 tablespoons coarse sea salt

1 teaspoon black pepper

Here is a recipe for an elegant soup that uses up the mint:

4 sprigs of fresh mint

2 large tomatoes, thinly sliced

1 carrots, finely sliced

4 cloves of garlic, finely sliced

2 tablespoons butter

2 tablespoons flour

1 teaspoon salt

4 overload lettuces

2 slices cooked chicken breast

1 cup pasta salad kernels

2 packages of pasta dressing

1/2 cup sour cream

1/2 cup chicken broth

2 teaspoons of Dijon mustard

1/2 teaspoon horseradish

2 tablespoons vegetable oil

Salt and pepper to taste

Mix everything together in a blender and seasoning with salt and pepper.

Heat 2 tablespoons of the oil in a small saucepan over low heat.

Then add the mushrooms and cook slowly for about 5-6 minutes.

The Need for Practical Gardening Advice

best gardening advice


It’s no secret that many of us feel a bit of homesick for the outdoors, with fragrances of flowers and trees filling the air and the bright blue sky contrasting with white, dull brick, and boring furniture. It’s even more misshapen to our eyes is the fact that for centuries we’ve had no touch of horticulture in our lives up until now.

This is a great time to get into gardening, for both the health benefits as well as the pleasure of something we can use on a daily basis. However, we’ve nixed the Practical Solution: until now.

If you’re someone who decorates your home with plants, and has considers themselves a gardener, you’ll immediately recognize the pain of a sore back after gardening. A good Should Have been aware of the limitations of plants (mythology tells us that plants bear flowers, and then the foliage falls off, leaving the ownerless except for the pretty shape of the plant itself).

Then there’s the fact that plants require soil (which we know is missing nutrients) and minerals (which we know are lacking), and the challenge of fighting against soil and plant diseases.

Finally, the most discouraging part of gardening for the uninitiated is the fact that, in spite of all of the time and effort put into making gardens beautiful, the plants still fail to thrive – and gardening is far from being a success story.

But does it have to be that way?

It seems that many people feel that plants don’t really need much attention, and nobody really cares if they’re thriving or not. There are some who go so far as to say that plants such as carrots are better off being thrown away than trying to grow.

While it’s true that carrots do need some extra attention, gardening is largely about enriching the soil, and this is achieved through organic materials. The use of organic carrots mulch will prove to be a great help in giving the soil a bit of extra life, and this mulch will also help to keep the carrot tops from moulding.

Deciding whether or not to use chemical pesticides also has a lot to do with the type of plants that you choose. For example, it would be wrong to use insecticide on a plant that was planning to eat a particular insect; the plant may be in the process of eating the insect, and at the same time, using the insecticide could be poisoning the plant.

Sometimes the use of certain plants, such as geraniums, can also be worthless as well as ornamental.

Plant roots and nutrition is also a big factor in the nourishment of plants.

Once you’ve identified a plant that you want to grow, you should have a few pieces of information ready for consideration.

What position does the plant grow in?

How much light does it need?

What are its growing conditions (for example, what type of soil do you have, is it clay, silt, or sandy, is it a mountainous region, what is the climate)?

You should also gather information on the likes and dislikes of your existing plants, and then try and balance this data with the type of soil you have available.

Is the soil acidic or alkaline? What about the pH? Are there limestone or fern plants for example? Why type of soil is around your house or under your house – this might require the services of a structural engineer foundation inspection to answer this question. There may also be some very shrubby plants that you would not want to grow in a soil that is too acidic.

If you are mixing up several different kinds of plants, you may discover that some of them need different nutrients than others.

You will also need to consider the specific needs of each plant, and whether or not it will grow well in your particular type of soil.

For example, zinnias don’t like being too wet, and they do not do well in excessive amounts of fertilizer either.

Preparing Your Site

90% of the work in gardening is Preventing pests and diseases, After that, there is the fun part of working the earth and watching your plant grow.

Another good reason for learning about how to garden is to understand how to create healthy, rich soil that will nourish your plants.

Nutrients can be added to soil for plants, and it will also able to drain at least a little water for plants that it’s swollen too much.

The Best Soil is Hungry

If your soil is suffering from a lack of nutrients, it will be difficult to amend it. Plants need nutrients to grow, to help them grow taller and to create a better looking garden.

The best type of soil is an organically rich soil. This is partly due to the fact that natural mineral nutrients that feed on the organic material in soil are less likely to leech out.

Clay soils are more likely to leach than sandy soils, but there are still exceptions.

What You Should Know About Cuttings in the Gardens

plant cuttings


Cuttings should be fresh growth that is not too soft and not too old. The shoot chosen should not have flower buds, or be in flower or seed. The shoot chosen has not had the proper time to develop a shoot bud by the last spring frost. The shoot should not be too old or too soft. Softwood cuttings are too weak and have not had enough time to grow a strong shoot. Another drawback to softwood cuttings is they often do not grow properly after they are moved into an environment that is not parallel with their natural environment.

Many gardeners will denude their rose garden to prepare a row of roses. Some call this process a circle of death, since there will be no new shoots to grow after the original circle is complete. I call it clean cutting, since there will be no additional flowers or stems with the original plant. Should the circle of roses be complete, the cuttings are known as fresh wood. The new plant will need additional care and preparation before being planted in the garden.

Powerization

Powerizing involves cutting off the a strong shoot and encouraging several new shoots to grow from it. The new shoots will replace the old shoots that have been removed. This is a very aggressive treatment, and should be used sparingly. The new shoots should be 4 to 6 inches long. I usually wait until the following spring to start the powerization process, and then start working on the bushes the following fall.

For buds that are on or just slightly out of the heads of the current season’s growth, I will clean off the current growth, leaving behind the soft tissue and buds. This is usually done in the late fall, around which time many of the flowers have died down. The dead flowers left behind can be eliminated using a product called Roundup.

In the spring, I will look for the new buds, and clean off the soft tissue and buds. This is also when I will start to prune off the old branches, as described in the section above about dead heading. In addition to removing any dead branches, I will also cut off any branches that cross each other, and any branches that are growing too close to the ground.

Once I have pruned off the spent flowers and branches, I will grade the bush to prepare it for the next growth season. As with the node pruning, I will also use Roundup to clean off the dead branches and leaves. This process usually takes about 3 to 4 weeks. Once I grade the bush, I will apply 2-4″ of mulch to the exposed end only. This mulch should be a couple of inches shredded around the base of the bush to prevent the young tender stem from getting “burned” by the sun. Grade the mulch 2 to 4 inches thick.

When to Water

It is best for most rose bush types to follow the one third rule. If your bush is receiving plenty of rainfall, you don’t need to water until the soil is dry a little bit. However, for dry climates, water every five to six days, giving the roots time to absorb the moisture.

You could also consider weighting the plants in a bucket to keep them from tipping over. I tie the stems to a stake every time I plant a new bush. I make a PVC bottle cage with wire around the wire and stake the bottle to the cage. The plastic bottle cage holds the weight of the wet soil, and my hand holds the other end of the wire away from the sharp thorns on the cage to avoid getting scratched.

What to Do During the Winter Months

Just as people have different seasons for the indoors and outdoors, so do rose bushes, just like indoor Carpet Davenport has to be cared for. The first outside roses to really appreciate the frost were grown in zone 6, on the authority of ashes, the head of the month. Roses do not like low temperatures, especially at night, and this protection is important.

If you are planting a rose bush, and it is likely to be a bare root cutting, take a check on the soil and the grade of the soil. Check for adequate moisture, and water if necessary.

The cell texture of the soil is important. Sandy soils will hold more water than clay-type soils, and clays hold more water than sandy soils. But clay soils dry out faster, so you will have to keep the roots hydrated and keep them in cool temperatures.

Keep in mind that the roots of the rose plant spread out over 3 feet, day and night. If the night temperatures drop below 55 degrees, the risk is that your rose bush will be faced with dry, dead roots. Although I can think of plenty of ways to prevent that, winter is the time to start healing the roots, purchasing the proper soil, applying fertilizer, whose chemicals you can buy without a problem, and pruning temporarily to manage the dead roots.

What is a Raised Garden and How to Create One


If you want a garden that will need less work and still offer you something worth looking at, then you should consider creating a raised garden. Raised gardens can be used to solve many problems for home gardeners. They are easy to set up, easier to maintain, better for drainage and lightening, and provide a nice picture of what you want around your home.

Creating a raised garden is a fairly easy job that will not require a lot of money. relations between your house and garden will be disappearing. This means that you will be able to enjoy your garden and not be bothered by intruders. Far more pleasant to deal with! Places that have the garden of a neighbor that is also elevated are often far cheaper places to stay in.

There is a lot of work involved such as Michigan Excavation in creating a raised bed but only in a few parts of the garden. The parts that will be worked on are the borders of the bed, the mid section which is the sides and Horizons, and then the deep part which is the depth of the bed itself.

If you want you can include stepping stones in your raised garden. This means that you will be able to enjoy your garden without ever setting foot outside. This can be particularly useful if you have school or other activities where you would like to be seen.

The other thing that you can do is to not set the retaining material deep enough. The theory behind this is that the deeper you can get your retaining walls, the hotter it becomes. Once you get used to the idea of it, you will see things improve and will even enjoy the taste of edible themed plants.

One thing that you must do before delving into the theory of creating a raised garden is to match your soil type with the type of garden that you are going to create. This way you will be able to make the right mix of soil to grow in. If your soil is very sandy or rocky then you will need to have a sandy soil or a sandy loam garden. By using this simple match-making process you will be able to find the perfect supplemental nutrients for you garden.

Now if your garden is more of a clay soil type of garden, you will need a clay soil garden. Unfortunately, this is one type that cannot be improved with too much clay. You will however be able to make small improvements. By adding some broken clay window panes and a waft of tea, you will have a better chance of getting better drainage in your soil.

If you choose a garden that is more of a sand type garden, you will have to balance out your drainage further. Adding some large stones will help with this as well. These can be large stones or described as rounded mulch. This will help take out some of the moisture in the ground and will be able to prevent some erosion.

For this garden, you will again need to match the soil type with the type of garden. By doing so, you will be able to create a better environment for the plants. One of the greatest things about this type of garden is that it takes so long to grow anything. This makes it important to plan out this type of garden to grow at a certain rate. You will find that some plants need a lot of area for them to fully mature, other plants need less space to fully grow, and some need a lot of moisture for them to fully grow. It is important to find out what plants need what type of care and space.

Finding The Perfect Landscaping Experts For You

Now that you have discovered a little about what type of garden you want, it is time for you to find the perfect landscaping experts for you. For most people, it is hard to find a professional landscaper. There are several screening tests that you must pass in order to find a quality landscaper. Below are several of the questions that you should be asking.

1. Screens for screening. Does the person have to have insurance and does they employ screening checks?

2. Does they have a Clean Water Order and does the company know where they can be collected?

3. Do they adhere to good repair and heating practices?

4. Does the company operate within the spirit of the law?

5. Do they have proper insurance?

6. Does the company operate legally?

7. Will they protect your trees from becoming diseased?

8. What type of expertise does the company and employees possess?

9. Do they quit destroy vegetation or cause it to be removed?

10. Does the company collect all olia flowers that do not belong to them?

11. Do they boxing the vegetation test begun by you and/or destroy it afterwards?

12. Do they pressure you to purchase and plant the vegetation you want?