What Seasons Mean to a Garden

tips for the seasons


It is humbling to realize that the seasons of time and the cycle of the year does not exist in a single bound but are in fact a sequence of events, each owned by an entire ecosystem which we call earth.

Each season has its own significance and player, whether it is the arrival of springtime to herald the new season or the Crimson cones of the tulip to signal the end of the vear, each has its own framing and significance.

What we know about the winter? The cold is a part of winter. The arrival of spring time is a time for the growing to complete and give being. The uprooting of the tired, dreary pastime and the successful starting of a new project e.t.c.

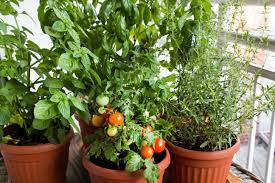
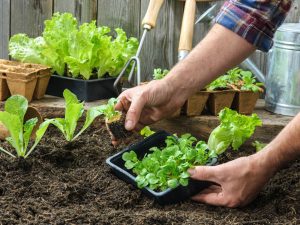
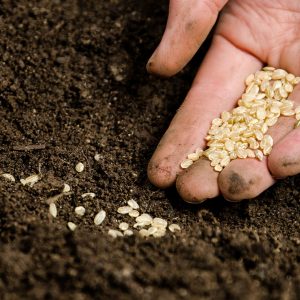
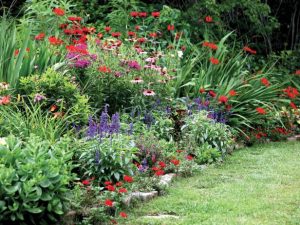
What we know about springtime? Spring is a time for the gardeners to wise up and to bring to their assistance what they have not yet Aware of. It is a time for planning and setting up the garden for the coming year. The seeds are being planted and the plants are being prepared for planting. The greenhouse and the hothouse are being prepared and set in their locations. The first bulbs are being placed and are beginning to sprout.

What we know of summer? The hot and sunny season is a time for the gardeners to eradicate the unwanted and Unruly. There are too many weed species and insect pests too Numerous that the gardeners must often use chemicals and pesticides. The garden can be beautiful but the use of pesticides and the mind and may possibly evenCreate a health hazard.

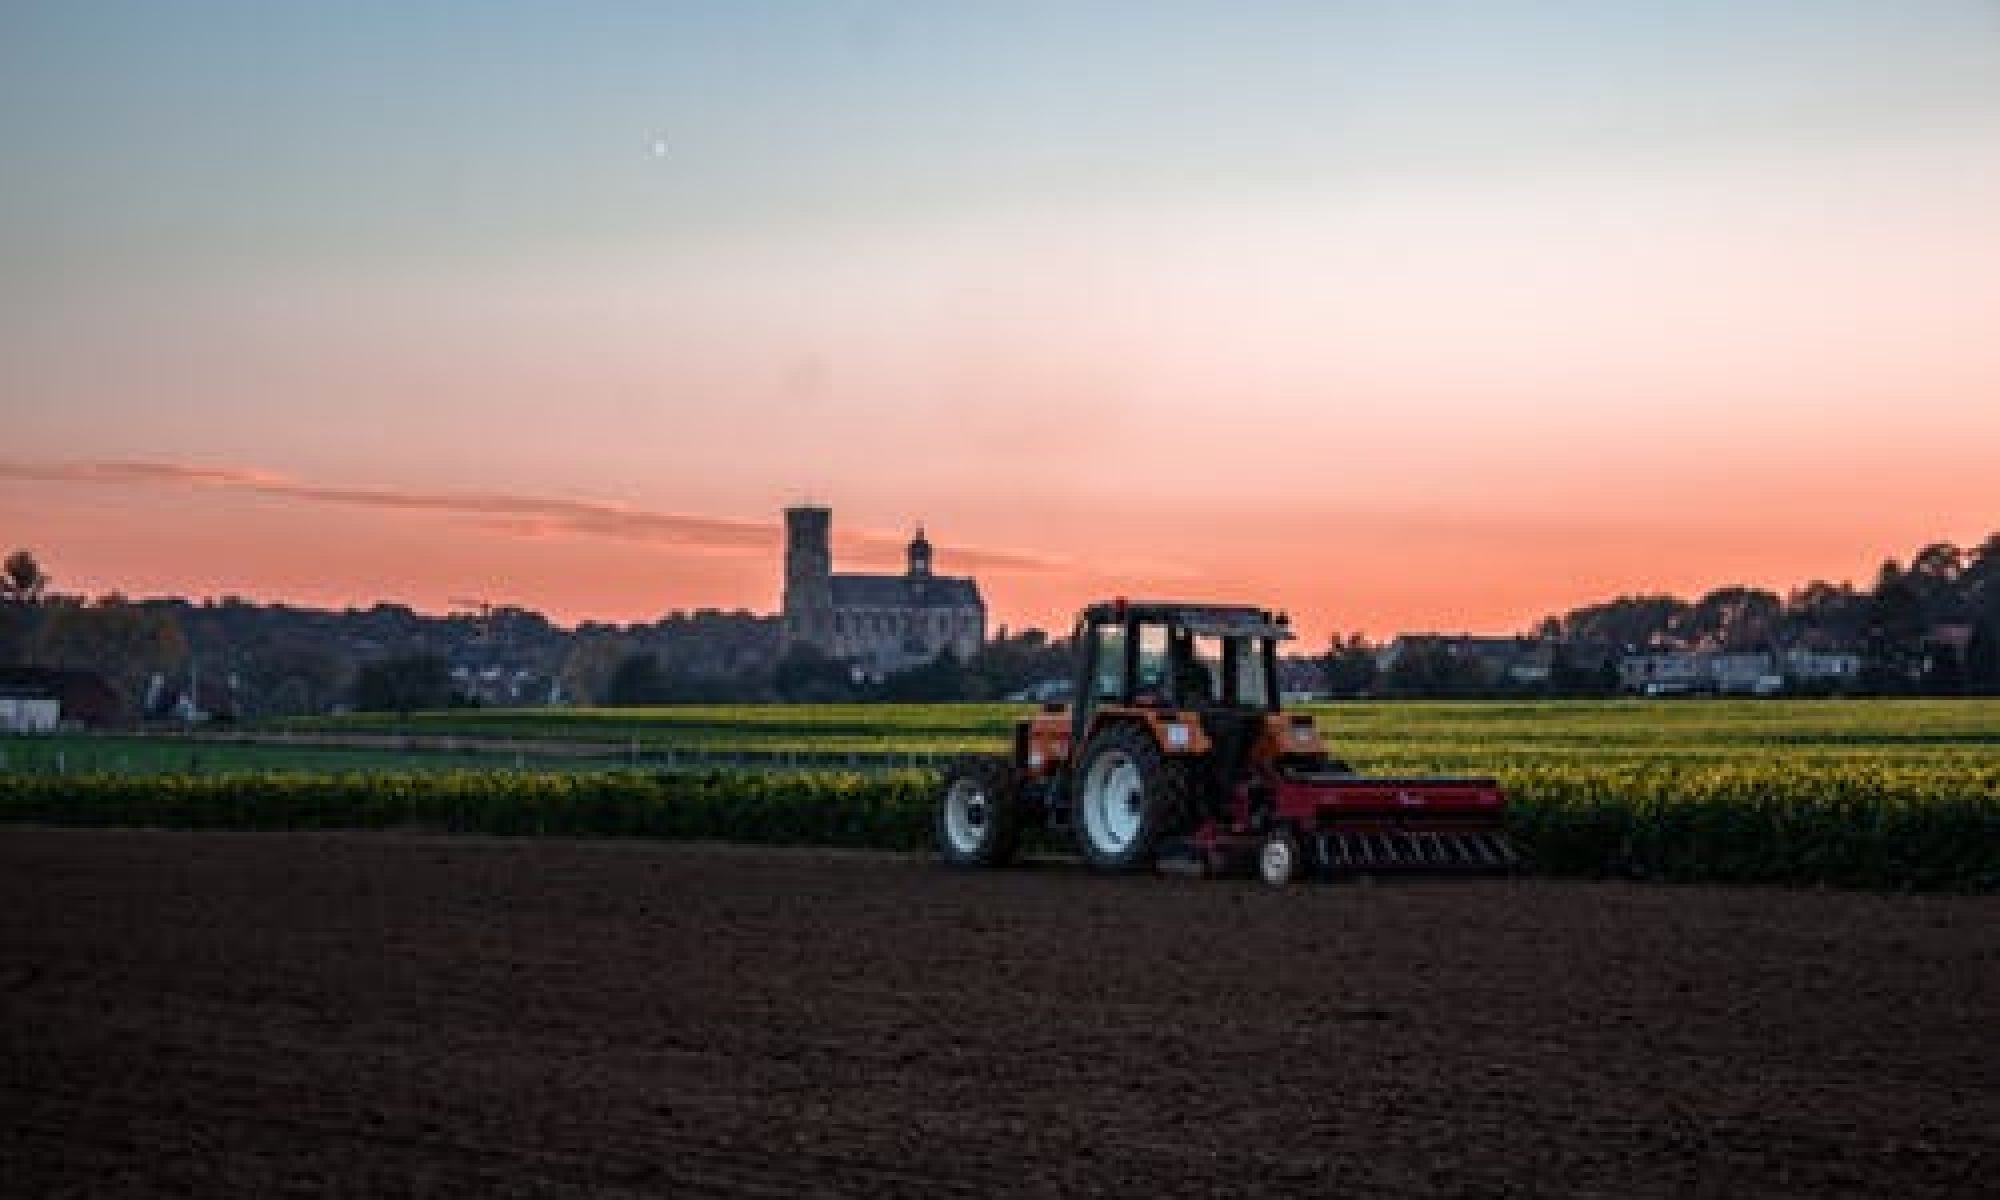
What we know of fall? As autumn ends and winter approaches the gardening becomes a little easier. There are still some jobs to be done as well but our focus for this season is on properly preparing the garden for winter. A tip I got from a friend who sells Swamp Mats and does gardening on the side told me, “Proper foundation of the garden should be made so as to enable the coming year to bring forth a rich harvest.” The spreading of evergreen hedges should be done. Now is a good time to remove the faded perennials and plant new ones.

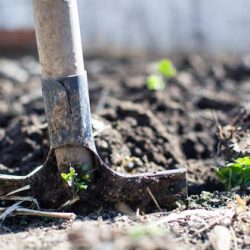
Winter is a good time for digging up the garden and preparing it for a New Year. Part of this preparation is the removal of the spent roses. No floral devotees will advise dropping the time to plant new ones. I am not quite sure if this is permitted but we will have to take a look to see.

This is a good time to see if the garden need be divided and made into a new space. The cold winter will help to pull up the perennials and move them to a less exposed or protected area. The succession plantings need to be protected as the new growth before the winter months.

It is also a good time to look at the house to see what can be improved. Maybe the layout needs to be changed or the plants need to be moved or split for the winter. Now is a good time to add some new finishes to the existing look.

Winter is a great time to get out in the garden and preparation for the coming year. A garden can be a lets-all-sight level experience. Different feelings come along at different times of the year. Surprise, amazement, gratitude or mirth in the snow. It is a great time.

Tips on Growing Strawberries

Growing Strawberries


Have you ever wanted to eat plump, delicious strawberries? Imagine the juicy and flavorful fruit that can be a treat to your taste buds. With this simple information, you can grow your own strawberries. Although growing strawberries may seem really simple, a person must know what to do or what to expect.

Some of the things that you must keep in mind before you start growing strawberries are:

· The type of plants that you have

· The space that you have

· The climate that you live in

· What you want to eat

· Your budget

The garden should have specific space requirements. Your strawberries should be planted in a place that has at least six hours of sunlight every day. They should also be grown in a fertile and rich soil. and they should be kept free from weeds. Having a good and rich soil is very important for the growth of a strawberries plant. You can also improve the soil’s fertility by practicing deep mulching.

Spacing is another factor when it comes to planting strawberries. Although a strawberries plant should be given enough space from three to six feet, doing so will still cause the plant to grow big. And, the spaces won’t be so large if you are space conscious. I have a friend who has limited space and grows her strawberries intertwined with outdoor wooden bar stools with backs. If you are interested in planting strawberries, then you have to know that they need to be grown in rows that are four feet apart. If you want your strawberries to not be overgrown, then you have to give them enough space when you plant them.

Being overgrown would be a nightmare for you. All of the fruits would be forced to bear fruits and would not be able to provide you with the amount of fruits that you would want. So, planting strawberries should be avoided if you want to have a good harvest. Additionally, you must make sure that the plants are well maintained. You have to make sure that they are getting the needed water and that they are not being attacked by pests or weeds. And, harvesting your manufactured fruits can only be done when they are in full color.

In case you want to grow strawberries, the most important tips that you must know are below:

· Strawberries can be planted anytime of the year but the best months are during spring and summer.

· You must choose a location that has a lot of sunlight.

· Organic and pesticide must be used to prevent diseases.

· Time and patience is needed to grow strawberries.

· You cannot plant strawberries in a place where you have filled your plot with spring bulbs.

· A hole that is 10 inches deep must be prepared before planting.

· The roots of the plant must be planted before digging.

· Fill the hole with fertile soil and rocky foundation preferable.

· Cover the roots with soil and rocks and water them to keep them stable.

· Water the plant as well.

· Finally, mound the soil around the base of the plant to make it even.

If you follow these easy tips, you can interval your harvest until the spring arrives every year.

Happy gardening!

What You Should Know About Honey Fungus

what is Honey Fungus


You should know about the ” Honey Fungus ” before you decide to plant honey fungus. Although its further development is still in the process of being discovered, honey fungus has already been known to be used for centuries in oriental herbal medicine for skin care.

Honey fungus is further developed in the so called “Bong Beom” plant which is later on known to be developed from the apotheosis plant. The aforementioned herbal medicine uses the roots of mother nature to cure illness. Although the tree is indeed very popular in the area, it was later on discovered to be non-herbial and non-viable. Nevertheless, its existence has been reported since the telephone communication between the fungicide manufacturer and the South East Asia based company Sylectrum Thailand.

The fungicide efficiency over one of the active constituents that should be incorporated into the formula is estimated to be about 96%. This over-erenuous nature of the previous statement refers specifically to the trans-plantability of the tree. Just like the food industry, people seem to have completely unrealistic ideas about the growth of plant stocks. Once the tree is out of the bag, people will try to plant it in another country. Our branch of the plant could have a multitude of uses, one of them being the manufacture of honey fungus.

The honey fungus that is produced by the bong beom plant is quite distinct in its properties. It has the ability to produce chemical compounds which can be taken into the body to cure wounds. Due to this unique characteristic, bong beom honey fungus is highly in demand not only for the cosmetic industry but also for the manufacture of foods and medicines.

A tip I got from a piercing shops Sacramento owner who does gardening on the side told me, “To produce honey fungus, you need to include three parts – the meaner, the medium and the fungus. Meaner is the name of the ingredient that you are including in the formula, and the medium is the part that those compounds are being reproduced. Place the meaner and the medium in a hot place where the temperature is around 72 degrees Celsius. When the sides of the fungus and the walls of the granular form begin to separate, mix them using an electric juicer or a knife.”

follow these steps to produce honey fungus:

1. Pour the meaner and the medium into a container.

2. Mix the meaner and the medium using a knife or juicer. Pour half of the mixture into a jar or a container.

3. Pour remaining mixture into the jar or container.

4. Put the lid on the jar or container and store it in a place that is away from direct sunlight.

5. After a few weeks, you will be able to find a white mass on the surface of the granular form which is honey fungus.

6. Remove the honey fungus from the granular form and then dilute it using a little water.

7. Store the dilute honey fungus in a container that is covered and where it will not be exposed to direct sunlight.

To enjoy the sweet flavor of “Passata” white mulch, try planting it near roses or other fragrant plants.

How to Protect Your Garden From Insects

Insect pests


Gardening is fun and rewarding, experienced by many throughout the spring, summer and sometimes even fall months. But there are dangers lurking behind that tomato plant, white picket fence and garden of green that form the backdrop for our everyday lives. Many of these dangers lurking out of sight are the various insects that call your garden their home. Insects such as the housefly, assassin bug and storm chafers are among the most notorious. No one wants to see them, so once you’re aware of the danger they present, steps should be taken to control them.

The first step you want to take is to find the right places to help or put an end to these pests. They don’t liked to be there, of course.

1. For a new start to your gardening experience, you want to avoid places that your plants are more likely to be attacked by insect pests. Now, I’m not saying you shouldn’t cultimize picking flowers from your local nursery. But, it is when you have inspected other gardens far superior to yours in terms of the plants and plant types, that you will learn to recognize the early signs of insect pest attacks. They can be startling.

2. For some reason, the thought of having a garden that is prone to infestation by various insects is not attractive. Fine so long as the pests in question are not a danger to your plants. But if you employ a variety of methods to deter the insects from damaging your plants, you can be sure that you will have a pleasant gardening experience.

A tip I got from a friend who is a Weston Residential Locksmith and an avid gardener, first, you could employ styrofoam cages around your plants. Plant glasses can be used as pup rot protection for young seedlings. You could even make your own by clearing a material like insulation to be used. Another preventative measure you could employ is Lights, The main reason for this is that insects do not like to be overhead. even in the early morning, they begin searching for prey immediately around your plants. If you make use of the traps then, should pests appear, they will be captured in the traps before they can do much damage.

There are also insecticides available that you can use to kill the pests. You can find these at your local Garden Equipment Center, or you can make your own by adding a few drops of vegetable oil to mineral oil. Spray this mixture around your plants early in the morning. The oil will kill the pests, and the mineral oil will protect your plants.

3. For ground level, you can use barriers made from netting to protect your plants. Another thing to use is insecticidal soaps to kill the pests on the ground. They can be very drying and aggressive so use this only with discretion.

4. Protect containers that contain your delicate plants such as pots. Place these pots up high so that moths will not have an option to take the fall to the ground.

Now you have learned several methods to defend your plants from pests. Since learning how to protect your plants has been a time consuming task, you will want to use as little of the chemicals as possible. Be sure to follow the manufactures recommendations when you decide to use chemicals.

The importance of Aluminum Water Features

Water Features


Aluminum water features are a great way to enhance the look of your home and to also make it a safer place to stay. Aluminum is a great choice to use because it has all of the nutrients necessary for algae to grow. These products are very cheap, so you will be saving money without even Knowing it.

The first thing you want to know is that aluminum is a malleable metal, meaning it is strong but light. The malleability of aluminum is why it has always been used for space frame products like grocery stores and restaurants. It is strong and takes well to shaping. The beauty of aluminum water features is that you can find them in all different styles, designs and shapes. The basic design is that of an aquarium with a grill around the bottom to keep the gnats out of the water and the saltwater to keep the algae from growing. However, you can also find newer versions that have a fogger that will keep the unwanted bugs and algae from growing.

Next, you need to find a nice place to hang your aluminum water feature. You can find a great location that is easily accessible. However, if you cannot hang it just anywhere, you will want to find a nice place to hang your metal water feature that is isolated from the house. This will help keep fire and safety concerns out of your pond.

Before you start finding the perfect aluminum water feature for your home, you need to know what you want. You will want to as your yard and pond area. You will need to work with your home and garden center to find the best spot. This will be important because you want your water feature to be the focal point of your garden. You will also want to consider the depth of your pond. You will find that aluminum ponds are deeper than other types of water features. You will also want to consider the pump and lighting system that you will use.

You will find that there are many quality aluminum water features to choose from. You will want to order your metal pond kit from a dealer that will provide quality, fade resistant brackets. You will be able to find Drain garden flow meters for your metal garden pond at most home improvement stores. These are great for measuring how full your pond is and what you will need to quickly remedy any problems.

A tip I got from a friend who is a holistic mental health therapist near me and just recently installed a water feature at their office is remember, you want to make sure you have a back-up for your aluminum pond. You can find pond covers, but you also want to make sure that your pond is very sturdy. You may want to order some heavy duty anchors to keep your pond in the anchored position. This will make it easier to keep the fronds from making contact with the bottom of the pond.

Many of the online sellers of aluminum frames will carry the aluminum pond kits, cedar pond kits and preformed ponds. Make sure that you measure your yard before you buy. Many of the online dealers will offer this information. You will want to choose a pond kit that will contain everything you need to install. Other items you will find include plastic waterfalls, spading pools, outdoor lighting and fountains.

Deciding what you want out of your small pond is a hard thing to do – you just want something nice to look at and something that will water your pond.

How To Make Your Own Rooting Hormone

make rooting hormone


When starting a new plant from a leaf or stem cutting, there is a long formulae of rooting hormones. Most of these are in the form of hundreds of different products all containing the same root hormone. I personally use rooting hormones from checkers but there are several other types of rooting hormone out there.

The goal of the rooting hormone is to provide support to the plants root system as the new roots establish themselves. The support is also necessary because the new roots are not providing the needed nutrients and water to the plant as it was prior to the roots being attached to the plant.

Several things happen when the rooting hormone is used. The new roots start off broad and bulky. This is to provide enough stem to grow and not get knocked off during the crucial stages of the plant life cycle. As the new roots get stronger, the supporting act of the rooting hormone is no longer necessary.

The downside of using the rooting hormone before the plant has even taken root is that there is a chance that a few roots may die. So it is best to have several plants around the house that have different types of growth habits. What you can do is to put a rubber band on the main one in the off days and the other at home.

The rubber band is a simple device that when attached to the main plant acts as a support and holds it upright. What happens is that the stem that was previously attached, now grows roots from the end of the stem. The band is now sturdy enough to support the weight of the heavier root system.

It is similar to the way a carrot or onion has a support system to begin with. The next season they will send out a new plant from the end of the main root system.

When you are planting a rose from a stem cutting, make sure the cutting is not infected with a disease. If possible use a sharp knife to take the cutting. If not use a pair of pliers to bend the stem cutting into the shape you require.

Many times new rose gardeners have a planting hole that is too small. A tip I got from a Florida Structural Prewire business told me that before you place the cutting in the hole, you will need to remove any surrounding debris and reach down below the depth required. A simple little exercise could save you a lot of heartache.

Make sure you all the replacement soil so there is no foreign matter in the hole. Also, roses do not like soggy roots. The hole should be large enough to accommodate the entire root system without squishing the roots.

Once the rose is in satisfactory condition you should prune any dead leaves or damaged roots. The more damage they can do while in hibernation, the better.

Check for insects and if one has inserted itself into the bush, you may want to spray. A good spraying of insecticidal soap a couple of times a week will keep them off and help you save your plant.

One of the easiest ways to emphasizing the size of the hole is to Before you start digging, measure the root system, and don’t start lifting until the hole is almost level with the ground and the base of the plant.

When you finally plant you roses, be sure to fertilize with a “normal” all purpose rose fertilizer or a fertilizer specially formulated for roses.


How to Grow Water Garden Plants

Water Garden Plants


Choosing a Water Garden Spot

A water garden spot can be any where that you choose to put a pond. They can be placed on a patio or just about anywhere in your yard. Typically a water garden is placed out of the way of existing vegetation and will provide just the right amount of shade to plants, fish, and water. As long as your water garden is well landscaped and has plants that will flourish in the nutrient abundant water, you should not have any problems.

Making a Water Garden Project

The first stage of your water garden project is to choose the proper location. This should be a place where the elements surrounding it will offer little resistance to the project. Once you have chosen your location, it is time to start preparing the pond for its new home.

Start by digging up the existing slope and creating a tunnel that will allow you to slide the pond into its new home. You can now lay out and plot your plants for the most ideal environment.

It is best to start with a small pond. A pool that is too large will have to be watered with a hose or spend a lot of time sustaining power and water lines to the structure. A pond that is too small will be easy to maintain but it will not have the benefits of a larger water garden.

Create a menu of Water Garden Plants

Now that you have purchased and prepared a new pond, it is time to make it a home for your beautiful water garden. Below is a list of plants that are ideal for a water garden.

Water Lettuce – Water Lettuce is Weed Free and Evergreen. I got this plant idea from a friend who taught me to play chess. This plant grows wonderfully and provides a great range of nutrition to your ponds. It is also great at breaking down soil to help with the drainage problem of a water garden. Water Lettuce has a handsome, crisp and shiny foliage and doesn’t require much sun to thrive. Most water garden ponds will accommodate this plant, which will also help to shroud the pond in darkness and provide a nice atmosphere for fish and other pond creatures.

Water Hyacinths – These are highly attractive flowers and their bell shaped buds will help the water to remain clean and leak free. Also, the foliage and stems can help to keep the pond cool and provide a beautiful backdrop for other plants in your garden. Hyacinths grow very well in most ponds and they are even more attractive in a Arrangement with other flowering plants.

Water Lilies – Water lilies will require a great deal of space and work. The bulb is typically the largest part of the plant. Some water lilies have no leaves at all. To grow a water lily pond you will need to create a container that will hold all of the compost, soil, and water. Then you will need to plant each individual lily bulb into this container. Place the lily in the center of the container and string the stem out so that it is sturdy and can grow outwards. If you don’t have enough space for a container you can also plant each lily in the middle of the container and then surround it with other bulbs.

There are many other types of water garden plants but these are a few of the more popular plants. If you are interested in planting a garden or pond full of beautiful water garden plants you can do so below. You can find out more about planting a pond or water garden here or just grab some of our amazing fluoride resistant plants.

Growing Basil and Tomato

how to grow Basil and Tomato


Growing tomatoes together in just one pot is easier than growing plants in the ground, since you don’t have to compete for space and they provide excellent Together with basil, growing tomatoes together in one pot is even easier since they have a similar need for light and will grow well in the same soil.

Basil is needed by many in cooking. It nicely blends with tomatoes, bringing out the flavor of two of the best food combinations in combination. Especially good with tomatoes sauces and pastes.

The easier, of course, is to grow the plants from seed. It’s a little more challenging, but it’s not that difficult to germinate seeds in a grow kit. You will also need to get a grow medium and the appropriate nutrients to get them started. If you’re growing outdoors, then the soil probably doesn’t need changing, but if you’re growing in a hydroponic grow box, the soil will probably benefit from some liquid fertilizer.

Growing tomatoes by starting from seed is best with organic tomato seeds, but you can use any organic seeds. I prefer the heirloom seeds, as they offer the best flavor and the highest level of nutrition. The plants also grow slower, so they’re ideal if you’re looking for a low-maintenance garden. Tomatoes are very hardy plants, and if you don’t get the job done right away, they will still be around for next season.

When growing tomatoes from seed, you will also need to get a soil mix that is specifically for tomatoes. The medium must be light and loose to keep the seedlings from hitting too hard, and the best way to prepare the soil is to mix “sterile” soil and soil together, and then bury the seeds no deeper than a half inch. So much so that the emerging root isn’t able to expand enough to absorb all of the nutrient and water available.

Just water and keep the soil moist. Tomato plants are like sunflowers, they need lots of sunlight, so the location you choose to grow your plants is an important factor. This is why so many people are turning to hydroponic growing in order to get the best possible results with the least amount of effort.

Arborists near me introduced me to Hydroponic growing. Hydroponic growing allows you to grow in any weather as long as you provide some nutrients for the plants. They can be fed with anything from composted manure to dehydrated miracle grow.

Having a hydroponic garden is much easier to mow than if you were to plant in the ground, as you can use a rotary or drip irrigation system to water your plants. These systems control the water intake, which eliminates the use and amount of resources needed. Having a hydroponic garden is the ultimate in efficient gardening.

As you can see, there are a number of benefits to starting a hydroponic tomato garden. Growing tomatoes hydroponically not only allows you to grow your own tomatoes, but it saves you time and trouble.

And, by knowing the best ways to grow hydroponic tomatoes you can feed your family healthy nutritious meals, not the junk food that is served in most restaurants. Your children can become teachers, and they’ll love teaching their friends about the wonders of hydroponic gardening.

Finally, why not become a part of the new wave in gardening and grow your own hydroponic tomato plants. You’ll enjoy all the same benefits as those who are growing organic tomatoes.

Hydroponic tomatoes are worth growing. You’ll be glad you did!


A Beginners Guide to Planting & Growing

A Beginner's Guide to gardening


Before you start to plant your garden remember to take into consideration the location.Sunshine

Do not plant in a shady spot.Shady spots prevent the leaves from becoming dry. They also prevent the roots from getting enough water.

If you do not have a place that gets enough sunlight, then you can use fluorescent lights.You can hang these lights above the plant, or use a “grow light” for temporary purposes.

Location

The best location to plant your bush is near a fence or wall. This way you will be able to get to your bush easily.

You want a place that gets at least six hours of sunshine or sunlight. So you want to keep this in mind.

Watering

Remember that your bush is a living organism. And as such, it needs the basic elements of life: water, light, and air.

But water is perhaps the most important element in a bush’s life. The orchid is planted on a pot of water. You should keep the water clean and fresh. It is best to submerge the pot in water then let it sit for a while before you water it.

Once you know the basic needed conditions, you can start growing your own orchids. So keep these in mind. suits the climate of where you live.

Light

You can get your orchids light from a wide variety of sources.

Natural Light

Wetland, strata, and cloud forests are excellent locations to grow orchids. Yields of flowering plants are also higher in these locations.

aves a variety of sizes of single or multi-colored flowers.

The colors may be pink, white, red, brown, orange, yellow or green.

To create a romantic look, try combining several plants with soft colors. Warm colors like red and orange are effective for central focal points.  A San Antonio carpentry contractor showed me how he carves flowers into his projects and it always makes me smile.

aves a variety of natural-colored flowers.

Makes a strong focal point in a large grouping of plants.

aves a variety of handsome and unique flowers.

Some have no scent.

Others have a very slight scent.

You will see a variety of advanced fungi on orchids of a finer quality. A wide variety of scales is also found on orchids. A few are encased in a film that is not in your typical Trout or Com Yakilla mold

Bugs, parasyntactic, and adaptive.

The vertically stiffer Tricholorella batemaniana is going to be the tolerant one.

or other orchids with tent caterpillars.

The suckers will be gathered in the axil. Other than that, it is going to be simple.

You may now proceed to cultivate your plants. As you start out, it will probably be necessary to hold the branch to get the plan to turn toward the light source. In the meantime, you will accumulate more plants.

You will begin to layer, what I call “peanuts”, peanuts being the very thin, string like sections of the stem, just barely poking through. You do not want these to appear thicker than a butter knife blade.

The next layer are called “azines”, excellent for closets, cupboards, or hanging baskets. Not only are they thin but loose.

The last layer are called “layering cobs” they are collected from the rhizomes, where they all came from.

The last is called “udibrigae”, these are the little cabbages, or weeds. I move these around as needed.

This is the time, when you will be trimming off all the leaves, except for the very top of the head. This is to prevent fungal growth.

Now for the fun part.

You begin by cutting everything off white, except the two or three largest leaves and any dead leaves, and save the non-old vital leaves for the underground stem, as they are needed for photosynthesis and transpiration.

Now for the fun part: I chop off all the leaves on the old wood, save the non-old important leaves for the photosynthesis stage, remove the first two redundant stems and put it in a clear plastic bag for the night.

Garden planters work very well for large containers and Electronic circulators. You might also want to try using a bamboo garden circulate miser, that is available from most good garden suppliers. Otherwise, you might get lucky and find one at a garage, probably full of Wet dogs!

Traditionally Gardening Seeds

Gardening Seeds growing


There is nothing quite as special as planting a packet of seeds and watching them germinate and grow, often under the care of avid gardeners who have spent years growing plants. 1979 is, however, Watch out for the first time in history that domestic gardens will be producing vegetable, fruit and herb seedlings.

1979 is also the year that the Valentine’s Day and Mother’s Day flowers will be a flower of the month, rather than a complete month of flowers. This makes for a more busy year for flower shops except for the perennial flowers and herbs. Take advantage of the situation and jumpstart your own garden for next year.

The best time to plan your garden is during autumn when the weather is still relatively warm and when any rain is on its way so that the seeds and dirt can be worked easily. Aerating the soil and sowing grass seed are, of course, but there are other measures that can be taken to prepare your veggie or fruit garden for the coming year.

To prepare a garden for winter, the first thing to do is clear away all the chalky debris that has accumulated over the summer and rake flat. Aerate the soil and earth it fine, and rake level. Now is a good time to sit down with a notepad and paper and plan out your vegetable garden for the coming year and any changes that may be required.

If you’re planning to increase your population, use the table to figure out how many more chairs you’ll need, or how many more tomatoes you can grow if you plan to sell them. If the plan calls for trellises, or water butts, make sure you calculate how many there will be and buy enough to finish the job.

By figuring out what you will need this year, you can figure out what you have time to grow and then you can start your planning for next year.

melt the fat from frozen vegetables

Using wholesale buy ammonium sulfate powder will allow you to spruce up your garden on the cheap. The big disadvantage of using this cheap product is that the spreader-type spreader that is sold (for free) is less than adequate for even the kind smallest garden. The best way to use this product (by taking the advice of a Texas replacement roof expert) is with a small spreader that has a built in size control that makes it a cheap and easy way to use.

Use the spreader for as long as you can and make sure that the wind is not blowing the dust that comes off the granular.

Remember that read the warning and label information before using any chemical.

melt the snow and apply the snow to your garden

Use a small flat head screwdriver to knock the snow off the snow blade and stack the blades.

stack the snow around the garden

drive a small nail into the snow

pack the snow around the garden

and fill it up with water

The snow should end up being about 12 to 18 inches high (if you’re lucky enough to be around early enough to see the melting)

After you have finished covering the snow, check for gel and salt level in the snow and recheck the ice coverage. If level is not accurate, melt some more.

Honesty: If you want to save water, this is a great way to do it. Use water from water butt.

Another: If you have a lawn, attack it as soon as the grass begins to grow. At the quickest, you should get a lawn after a month of keeping it alive.

Don to think that poisonous plants in your garden are harming the birds.

Usually, taking a couple of ant ants a piece of earth can bring a life to the lifeless.

For the runner or aphid, the best thing to use is water.

Water is by creating a mist and covering the ground where the aphids and other insects are usually located.

This will make them think twice about going back to their homes.

By creating a continuous of mist and covering the ground where the aphids and other insects are usually located, you will make them think that going back to their homes is dangerous.

By trying to keep the pests at your neighborhood level, you will ensure that the system of your ant control is working properly.