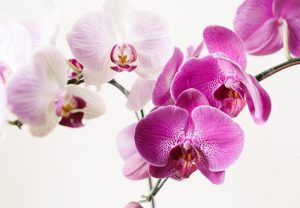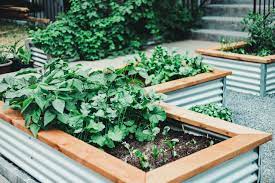

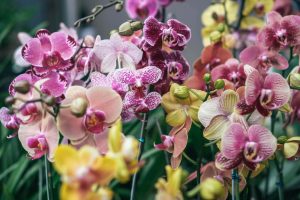
When getting started with growing orchids, it can seem daunting. If you’re new to the world of orchids, it can seem like a difficult task to make your orchids bloom. If you don’t know what you’re doing, this can make you feel like you’re not on the right track. Orchids are remarkable plants that tend to bloom without much notice. However, if you do make mistakes along the way, your orchids will not bloom as bountifully as you’d like. Here are some tips to avoid making common mistakes with orchids.
Don’t water them like a cactus
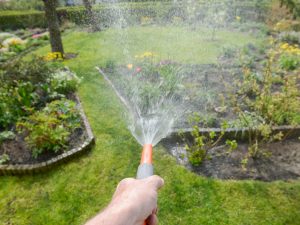
Determining when and how much to water your orchids is an essential part of orchid care. This is especially true for cacti, as they require dramatic changes in the amount of water as well as temperature. A key factor in determining when to water your orchids is also the way the orchid is packaged• grade orchid medium (organic, clay, etc.)
When you buy an orchid, you can typically purchase its medium (oidh) already prepared for it. Organic (grown in the house) or synthetic (grown in a laboratory) orchids typically have solutions prepared for them that contain vital nourishment the orchid will need for it to grow beautifully.
If you’re concerned about the quality of your orchid’s soil, you can visit an orchid nursery and be sure to ask for recommendations.
Don’t fertilize your plants like a mole
When you are trying to determine when and how much to water your orchids, you must also consider the type of fertilizer you use. Not all fertilizers are the same. Some can be too high in nitrogen, which is essential for orchids. Other fertilizers can be too low in nitrogen, which is essential for growing these types of plants. It is also essential that you properly flush your plants with pure water to prevent fertilizer salt build up (the salt can kill the roots).
Just as a side note, some people try adding hot water to their plants to “help” the fertilizer along. Do not do this. It is not necessary and is actually harmful to your plant.
Don’t start a plant in a humidity tray
In the wild, orchids grow naturally in rain forests and other tropical areas. They grow attached to trees in a constant air current. You can recreate these conditions in a small humidifier. However, the average home environment is not suitable for these plants.
If you are interested in growing your own orchids, you do have the option to start from seeds. This will allow you to know exactly when your plant will be ready to be transplanted outside. It will also help you determine how many plants you should have in order to get the right amount of blooms.
Cut back on fertilizer
Orchids require much less fertilizer than many other house plants. Many elderly buy orchids to put in their handicap bath for this exact reason. This is because the type of blooms they grow naturally are what attracts the insects to their hideaway. In fact, some orchids require no fertilizer at all!
Turn on the heater
Orchids are known for being temperamental and need the right type of temperature in order to thrive. Again, you want to avoid the possibility of your plant becoming Too hot and drying out. Usually, a 65 to 70 degree temperature is plenty. As long as the weather is warm, the orchid will have blossoms.
However, if the temperature drops much below 60 degrees, you will have to place your plant outside in the summer. In some climates, the outdoor temperature is only supposed to be a minimum of 65, but keep in mind that it can go as far as 80 or 85. Obviously, the outside temperature will need to be at least 65 degrees.
On the other side of that, in many areas of the United States, the Departs Day is on the first Saturday of April. That would mean that you would have to wait until the end of May for your orchids to bloom. Of course, this is because some of the orchids’ natural climate elements will not be present at this time.
There are work arounds you can use for when you are trying to figure out when to water your orchids. Try waiting for the day just to be sure. Some orchids prefer to have water sitting on their roots all night. You can use a shallow pan and some rocks to create a humidity tray. Your orchid will love these trays, as they will create moist air, and the warm water will evaporate.
You can also create humid conditions inside your orchid’s home. You may need to turn up the temperature in your home to at least 60 to 70 degrees Fahrenheit.